
Crochet Pumpkin Pattern Free — Easy Beginner Amigurumi (Halloween)
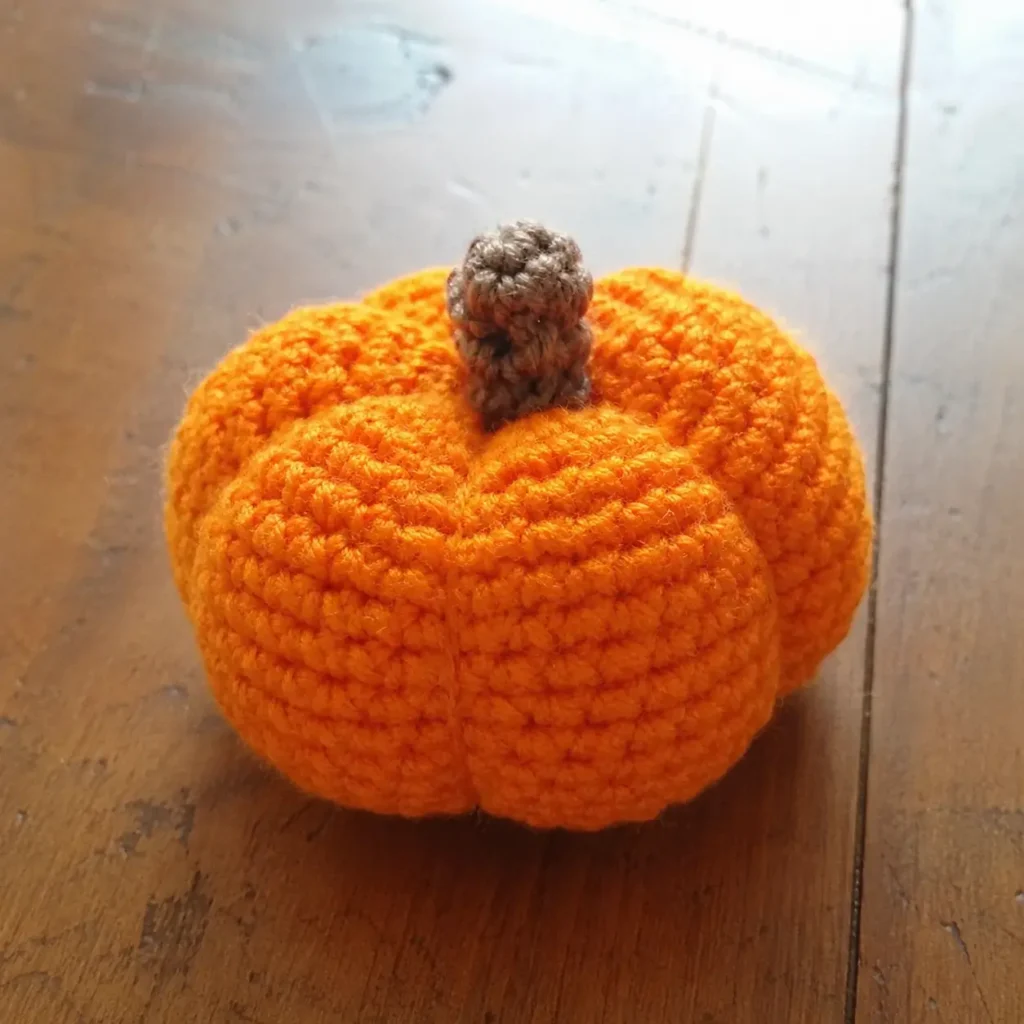
This crochet pumpkin pattern free is the easiest in the Halloween amigurumi series — round body, simple stem, and that classic ridged shape comes from cinching after stuffing, not from complicated shaping. If you’ve already made the ghost or bat, this one works up even faster. About 30 minutes from magic ring to finished pumpkin.
The cinching technique is what makes this crochet pumpkin pattern free stand out — instead of shaping the ridges stitch by stitch, you sew them in afterward. It sounds fiddly, but once you try it you’ll wonder why anyone does it any other way.
Materials
This post contains affiliate links. If you purchase through these links, I may earn a small commission at no extra cost to you.
Yarn
- Bernat Blanket Yarn in Pumpkin Orange — the color in the photos
- Lion Brand Velvet in Brown — for the stem
- Any bulky chenille #6 works — or try worsted weight for a smaller pumpkin
Hook
Other supplies
- Polyfill Stuffing
- Tapestry needle — essential for the cinching step, not optional
Finished size: approximately 4 inches wide with bulky chenille yarn.
Abbreviations (US Terms)
- MR — magic ring (check our magic circle crochet tutorial)
- sc — single crochet
- inc — increase (2 sc in same stitch)
- dec — invisible decrease
- rnd — round
- st(s) — stitch(es)
Crochet Pumpkin Pattern Free — Step by Step
Body
Work in continuous rounds. Place a stitch marker at the beginning of each round.
Rnd 1: 6 sc in MR (6)
Rnd 2: inc in each st around (12)
Rnd 3: (sc, inc) × 6 (18)
Rnd 4: (2 sc, inc) × 6 (24)
Rnd 5: (3 sc, inc) × 6 (30)
Rnd 6–10: sc in each st around (30) — 5 rounds straight
Rnd 11: (3 sc, dec) × 6 (24)
Rnd 12: (2 sc, dec) × 6 (18)
Stop here and stuff. Keep it soft and squishy — don’t pack it tight. A squashy pumpkin cinches into much nicer ridges than a firm one.
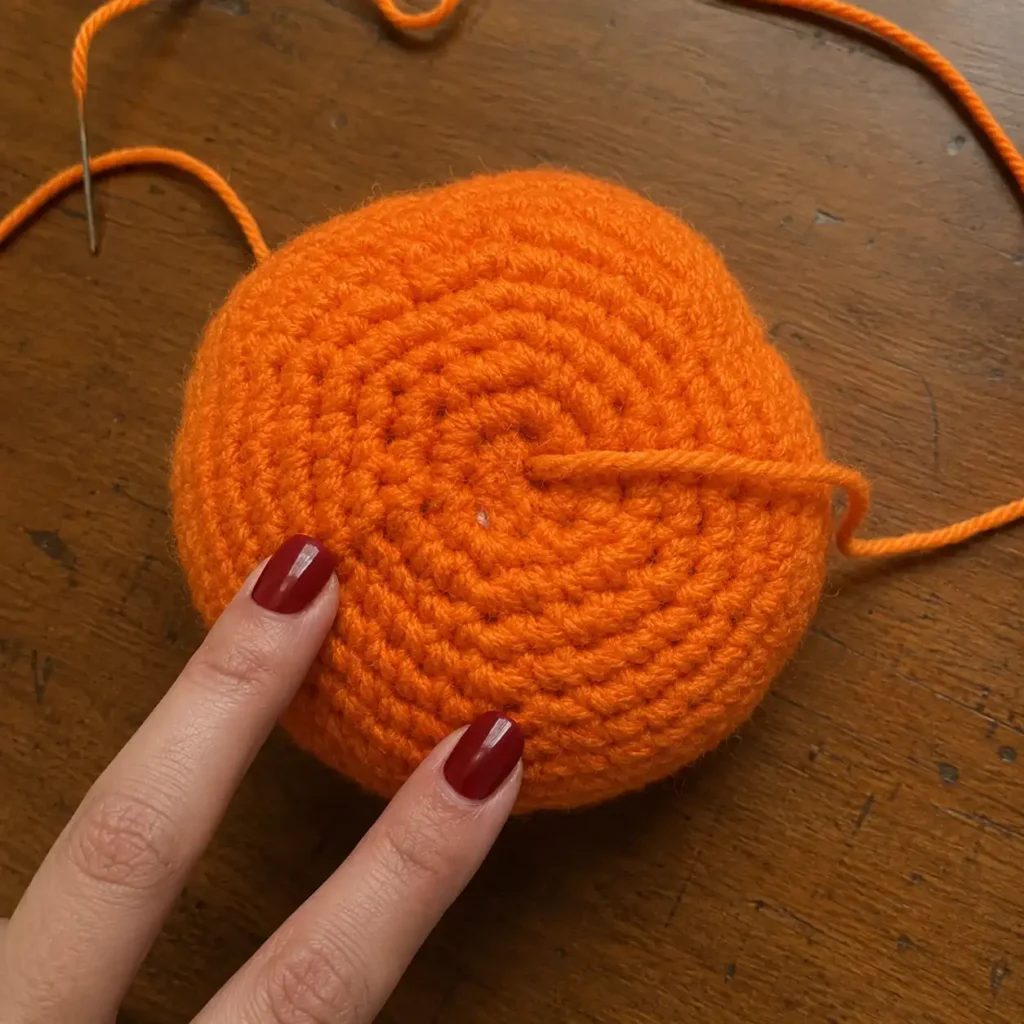
Rnd 13: dec × 6 (6)
Fasten off, leaving a long tail — at least 20 inches. Thread through the front loop of each remaining stitch, pull to close. Don’t cut the yarn yet.
Creating the Pumpkin Ridges (Cinching)
This step is what makes this crochet pumpkin pattern free look like an actual pumpkin instead of a plain ball. It takes about 5 minutes and makes all the difference.
Thread your long tail onto a tapestry needle. Insert it down through the center top hole (where you just closed the pumpkin) and bring it out through the center bottom.
Look at the body — the increases from Rnds 2–5 created 6 natural vertical lines running top to bottom, like a hexagon. These are your cinch lines.
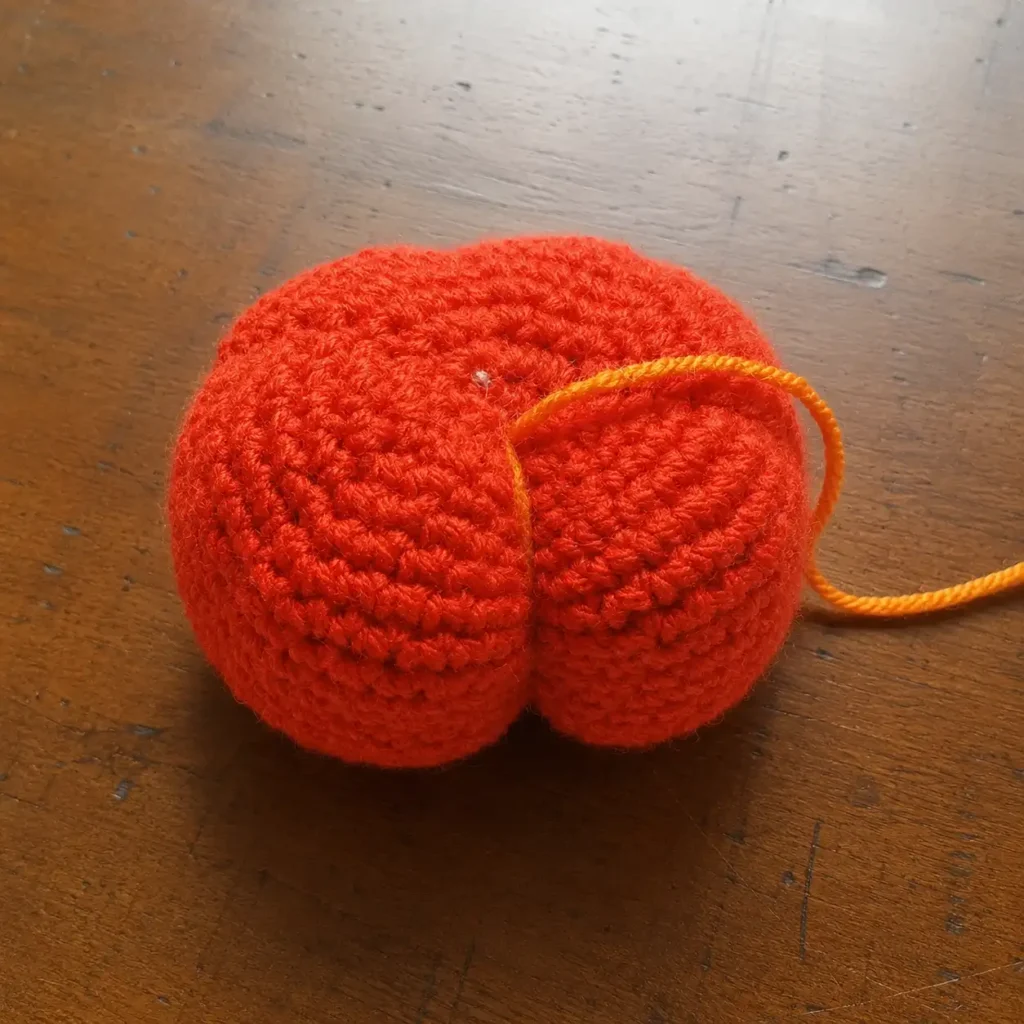
Lay the yarn along one of these lines, top to bottom. Push the needle through the bottom center, bring it straight back up through the top center, and pull firmly. One ridge made.
Repeat on each of the 6 lines, pulling each one to the same tension so the ridges look even.
Tie off securely at the top and weave in the end.
Stem
Rnd 1: 6 sc in MR (6)
Rnd 2–4: sc in each st around (6) — 3 rounds
Fasten off, leaving a 6-inch tail. Stuff lightly — just enough to hold the shape. Sew to the center top of the pumpkin.
Finishing
Weave all remaining ends through the inside. If the ridges look uneven, pull the looser cinch threads a bit tighter before tying off — it’s easy to adjust while the tail is still long.
Variations of This Crochet Pumpkin Pattern Free
Mini pumpkin — use worsted weight yarn and a 4.0mm hook. Same rounds, finishes at about 2.5 inches. Great for clusters and garlands.
Jack-o’-lantern — before stuffing, add safety eyes and embroider a triangle nose and jagged mouth with black yarn. Do this while the opening is still large enough to work comfortably.
White pumpkin — swap orange for cream or white for a modern farmhouse Halloween look. Same pattern, completely different vibe.
Pumpkin hat for your ghost or bat — stop the body at Rnd 8 (don’t stuff or close), and place it on top of your ghost or bat as a hat. Tack in place with a few stitches.
Striped pumpkin — alternate two colors every 2 rounds for a graphic, modern look like the black and orange one in the photo.
Tips from One Crocheter to Another
Don’t stuff too firmly. This matters more in this crochet pumpkin pattern free than in most amigurumi — the cinching needs some give in the stuffing to pull the ridges deep. If it’s packed tight, the lines stay flat.
Count your vertical increase lines before you start cinching. There should be 6, one for each increase point. If you sew them out of order or skip one, the shape goes lopsided fast.
Use a contrasting yarn color for the cinching thread the first time you try this. It makes it much easier to see where you’ve already sewn. Switch to matching yarn once you’re comfortable.
The longer you leave the tail, the easier the cinching is to manage. 20 inches is the minimum — 24 is better, especially with bulky yarn.
Project Ideas
Autumn trio — make 3 pumpkins in graduating sizes (change hook size, same pattern) and display together.
Halloween amigurumi set — pair this pumpkin with the ghost and bat patterns for a complete Halloween trio. They work beautifully together on a shelf or mantel.
Pumpkin garland — make 6–8 mini pumpkins and string them on twisted twine, using the stem as the attachment point.
Basket centerpiece — fill a small wicker basket with 5–6 mini pumpkins in mixed colors for a table centerpiece.
FAQs
Is this crochet pumpkin pattern free suitable for complete beginners?
Yes — it’s the simplest pattern in the Halloween amigurumi series. No wings, no ears, no separate pieces to join (except the stem). The cinching technique sounds complicated but takes less than 5 minutes once you understand it.
What if my ridges look uneven?
Pull the looser cinch threads a little tighter before tying off. You have full control over each ridge independently — adjust as you go.
Can I skip the cinching step?
Technically yes, but it’ll just look like an orange ball. The ridges are the whole point of this crochet pumpkin pattern free — don’t skip them.
What hook size should I use?
6.0mm with bulky chenille (#6) for the size in the photos. Drop to 4.0mm with worsted weight (#4) for a smaller pumpkin using the same rounds.
Can I use a different color?
Absolutely. White, red, striped, deep purple — the cinching technique works regardless of color. The orange is traditional but any color makes a great pumpkin.
Can I sell finished pumpkins made from this pattern?
Yes. Please credit Patterns Here as the pattern source when posting online.
How long does one pumpkin take?
About 30–35 minutes including the cinching and stem. The fastest pattern in this Halloween series.
See Also
- Free Crochet Ghost Pattern — Easy Beginner Amigurumi
- Crochet Bat Pattern Free — Easy Beginner Amigurumi
- Magic Circle Crochet — Step-by-Step Guide
- Crochet Abbreviations — Complete Reference Chart
- Halloween Granny Square — Free Crochet Patterns (10+ Spooky Motifs)
- 25+ Free Halloween Crochet Patterns — Ghosts, Bats, Pumpkins & More