KNITTING

Sophie Scarf Knit Pattern: The Beautiful Scandinavian Hood Knitters Are Obsessed With

Sophie Scarf Knit Pattern 🧶✨

The Sophie Scarf Knit Pattern has become one of the most recognizable modern knitting accessories in recent years. Loved for its clean construction, minimalist lines, and exceptional versatility, this pattern represents everything knitters admire about contemporary Scandinavian design.

Rather than following fast-fashion trends, the Sophie Scarf focuses on timeless appeal, making it a piece you’ll reach for season after season. It works equally well as a practical winter layer and as a subtle statement accessory that elevates everyday outfits.

In this complete guide, you’ll discover the inspiration behind the Sophie Scarf Knit Pattern, learn more about the designer, explore yarn and tool recommendations, find care instructions, and understand why the knitting community continues to embrace this design worldwide. We’ll also guide you directly to the official pattern, ensuring full credit and support for the original creator.


🧵 The Origins of the Sophie Scarf Knit Pattern

The concept behind the Sophie Scarf Knit Pattern is deeply rooted in Nordic knitting traditions. Historically, hoods were practical garments used across Scandinavia to protect the head and neck from cold winds while allowing freedom of movement.

What makes the Sophie Scarf special is its modern reinterpretation of this traditional form. Instead of heavy layers or decorative excess, the design embraces:

  • Clean edges
  • Thoughtful proportions
  • Minimal shaping
  • A refined silhouette

This approach reflects the Scandinavian philosophy of less but better. The result is an accessory that feels intentional, wearable, and perfectly aligned with modern wardrobes.


👩‍🎨 About the Designer

The Sophie Scarf Knit Pattern is designed by PetiteKnit, a name synonymous with high-quality modern knitting patterns.

PetiteKnit is widely respected for creating designs that are:

  • Clean and timeless
  • Carefully graded and tested
  • Focused on wearability rather than trends
  • Accessible to knitters of varying skill levels

The brand has played a major role in shaping today’s minimalist knitting movement, especially across Europe and North America. Each pattern emphasizes thoughtful construction, professional finishing, and a calm, cohesive aesthetic.

By purchasing and knitting a PetiteKnit design, knitters not only gain a beautifully written pattern but also support independent design rooted in craftsmanship and long-term value.

sophie scarf

🧶 Recommended Materials & Tools (Affiliate Suggestions)

Choosing the right materials is key to achieving the polished look the Sophie Scarf Knit Pattern is known for.

Essential Tools

Yarn Recommendations

For best results, look for yarn with:

  • Good stitch definition
  • Soft but structured texture
  • Wool or wool-blend fibers
  • Light to medium weight for layering

Neutral tones such as cream, beige, grey, camel, or soft brown are especially popular, reinforcing the Scandinavian aesthetic.

👉 You can find high-quality yarns, circular needles, and finishing tools through trusted Amazon affiliate links.


📌 Where to Find the Official Pattern

The Sophie Scarf Knit Pattern is available exclusively through the designer.

➡️ Get the official step-by-step pattern here:
[Official Sophie Scarf Knit Pattern – PetiteKnit]

Buying the original pattern guarantees:

  • Accurate instructions
  • Proper sizing guidance
  • Ethical support for independent design

🧠 Pro Knitting Tips for the Sophie Scarf Knit Pattern 🧶✨

Even though the Sophie Scarf Knit Pattern is known for its clean and minimalist construction, achieving a truly professional result depends on technique, yarn choice, and finishing details. These advanced tips will help elevate your final piece from “handmade” to “designer-quality.”

✔️ Master Your Gauge First

Gauge is especially important for accessories like hoods, where fit around the neck and head directly impacts comfort.

  • Knit your gauge swatch in the same stitch pattern used in the hood
  • Wash and block the swatch before measuring
  • If your fabric feels stiff, try going up half a needle size

A correct gauge ensures the hood sits comfortably without feeling tight or collapsing.


✔️ Choose Yarn for Structure, Not Just Softness

While ultra-soft yarns can feel appealing, they may lack the structure needed for this design.

  • Look for yarn with elasticity and memory
  • Wool or wool-blend fibers perform best
  • Avoid yarns that split easily, as they reduce stitch definition

The Sophie Hood relies on crisp edges and even stitches — yarn choice makes a noticeable difference.


✔️ Maintain Consistent Tension

Uneven tension is one of the most common issues knitters face with minimalist designs.

  • Relax your hands and avoid pulling stitches too tightly
  • Check your tension regularly, especially after breaks
  • Use circular needles with smooth joins to maintain flow

Because the design is simple, inconsistencies are more visible — steady tension is key.


✔️ Focus on Finishing Details

Professional finishing elevates the entire piece:

  • Weave in ends invisibly along stitch paths
  • Block gently to sharpen edges and smooth fabric
  • Shape the hood carefully during blocking to enhance structure

Take your time here — finishing is what separates a good knit from an excellent one.ificantly improves the final look, giving the hood its signature clean structure.


🧼 Care Instructions for Your Sophie Scarf 🧺🧴

Proper care is essential to preserve the beauty, shape, and longevity of your finished Sophie Scarf Knit Pattern. Since this accessory sits close to the face and neck, gentle handling is especially important.

🧴 Washing Guidelines

  • Always hand wash unless the yarn label explicitly allows machine washing
  • Use cold or lukewarm water
  • Choose a mild, wool-safe detergent
  • Gently press the fabric — do not scrub or twist

Hand washing helps maintain fiber integrity and prevents stretching.


💧 Rinsing & Water Removal

  • Rinse thoroughly to remove detergent residue
  • Support the hood fully when lifting from water
  • Press out excess water between towels

Avoid wringing, as this can permanently distort the shape.


🌬️ Drying & Blocking

  • Lay flat on a dry towel
  • Shape the hood carefully, aligning edges and curves
  • Allow to air dry away from direct heat or sunlight

Blocking helps restore stitch definition and gives the hood its refined silhouette.


📦 Storage Tips

  • Store folded, never hanging
  • Keep in a breathable cotton bag
  • Add natural moth repellents like cedar or lavender

Proper storage prevents stretching and fiber damage over time.


💬 What the Knitting Community Is Saying

The Sophie Scarf Knit Pattern has received overwhelmingly positive feedback from knitters around the world.

Common highlights include:

  • Clear and concise instructions
  • Elegant yet simple construction
  • Quick project turnaround
  • Versatility for daily wear

Many knitters enjoy making multiple versions in different yarns, noting how the hood adapts easily from casual to more polished outfits.

Social media platforms like Instagram and Pinterest have helped the design go viral, with countless variations showcasing personal style while maintaining the original pattern’s integrity.


❓ Frequently Asked Questions (FAQs)

Is the Sophie Scarf Knit Pattern beginner-friendly?

Yes. Confident beginners with basic knowledge of knit stitches and circular needles will feel comfortable following the pattern.


How long does it take to knit the Sophie Scarf?

Most knitters complete the project within a few evenings, making it a satisfying and relatively quick accessory knit.


What yarn weight works best?

Light worsted or DK-weight yarns are commonly recommended, offering a balance between warmth, structure, and drape.


Can I substitute yarn brands?

Absolutely. As long as you match gauge and fiber characteristics, substitutions work well. Always knit a gauge swatch first.


Is this pattern suitable for gifting?

Yes. The Sophie Scarfis one of the most popular gift knits due to its timeless design, practicality, and universal appeal.


Does the hood stretch out with wear?

When knit with appropriate yarn and cared for properly, the hood maintains its shape very well. Wool fibers naturally bounce back after use.


Can I customize the length or fit?

Minor adjustments can be made by altering gauge or needle size, but following the original pattern ensures the intended fit and proportions.

sophie scarf details

🔗 Suggested Internal Links


📣 Final Thoughts & CTA

The Sophie Scarf Knit Pattern stands as a perfect example of how thoughtful design and simplicity can create something truly lasting. Whether you’re expanding your accessory collection or looking for a refined handmade gift, this pattern delivers both style and function.

👉 Follow us on Pinterest and Facebook for more curated knit patterns, designer highlights, and timeless project inspiration.

✨ Credits to the original designer — you’ll pass through our site and then be redirected to their official page to get the pattern. 💕

The Definitive Classic Knitting Sweater: The One Every Knitter Makes 🧶

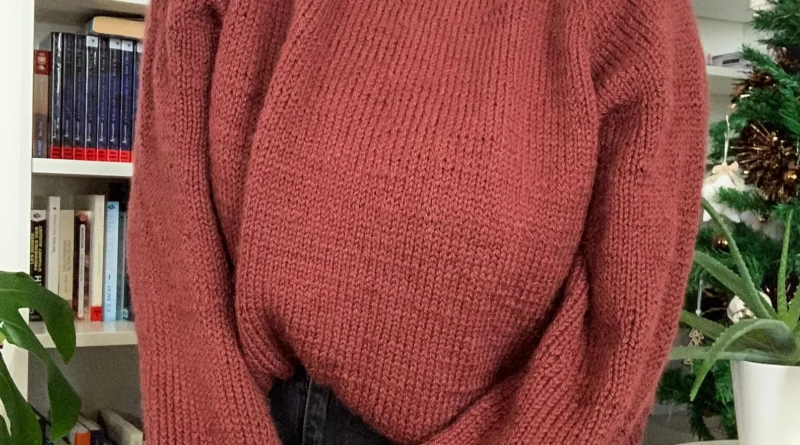
The Most Iconic Knit of All Time

When people think about knitting, one garment immediately stands out as the foundation of the craft: the Classic Knitting Sweater. Simple, elegant, and endlessly wearable, this sweater represents everything that makes hand knitting timeless.

Unlike trendy designs that come and go, the Classic Knitting Sweater remains relevant decade after decade. It is the piece that appears in old knitting magazines, family photo albums, and modern minimalist wardrobes alike. Whether knit for warmth, style, or tradition, this sweater has earned its place as the most iconic knitted garment of all time.

In this guide, you’ll learn what defines a classic sweater, how it is traditionally constructed, which materials work best, and how knitters around the world approach this timeless design. You’ll also find pro tips, care instructions, FAQs, and a direct link to the complete PDF pattern available on Etsy.


What Defines a Classic Knitting Sweater? ✨

A Classic Knitting Sweater is not defined by trends or embellishments. Instead, it is characterized by balance, simplicity, and longevity.

Key features include:

  • Clean, uncomplicated stitch patterns
  • Neutral or solid color palettes
  • Traditional ribbing at cuffs, hem, and neckline
  • Comfortable, well-proportioned fit
  • Minimal shaping that enhances durability

This sweater style focuses on function and form, allowing the quality of the knitting itself to shine. Because of this, the Classic Knitting Sweater is often the first full garment knitters attempt — and the one they return to again and again.


Why the Classic Knitting Sweater Never Goes Out of Style 🕰️

The reason the Classic Knitting Sweater remains timeless is simple: it works in every era.

Historically, knitted sweaters were created for practical purposes — warmth, durability, and protection from harsh weather. Fishermen, farmers, and outdoor workers relied on simple sweater constructions that could withstand daily wear.

Over time, this functional garment transitioned into everyday fashion, but the core design remained unchanged. Today, the Classic Knitting Sweater is still valued because:

  • It layers easily with modern clothing
  • It suits all genders and age groups
  • It adapts to casual, professional, and cozy looks
  • It allows endless customization without losing its identity

No matter how fashion evolves, this sweater always feels appropriate.

Timeless Classic Knitting Sweater in stockinette stitch with ribbed cuffs, hem, and neckline

Materials & Tools for a Classic Knitting Sweater 🧵

Choosing the right materials is essential for achieving a truly classic result. The yarn and needles you select directly affect the sweater’s structure, drape, and lifespan.

Yarn Recommendations

For an authentic Classic Knitting Sweater, prioritize yarns that balance comfort and durability:

Neutral shades such as cream, gray, navy, beige, or black enhance the timeless feel of the garment.

Needle & Tool Essentials

These tools help ensure consistency and professional finishing.


Classic Sweater Construction Methods Explained 🪡

The Classic Knitting Sweater typically follows one of two proven construction methods. Both preserve the timeless aesthetic while offering different knitting experiences.

Flat Knit (Seamed Construction)

This is the most traditional approach.

  • Knit the front, back, and sleeves separately
  • Sew pieces together after blocking

Why knitters love it:

  • Excellent structure and shape retention
  • Easier to adjust sizing panel by panel
  • Ideal for learning garment construction

This method is commonly found in vintage patterns and classic knitting books.


Top-Down Seamless Construction

A modern interpretation of the Classic Knitting Sweater.

  • Begin at the neckline
  • Knit downward in one piece
  • Try on as you go

Why knitters choose it:

  • No sewing required
  • Adjustable length and fit
  • Smooth, continuous fabric

Despite its modern technique, the finished look remains timeless.


Step-by-Step Overview: Classic Knitting Sweater 🧶

1️⃣ Gauge Swatch (Essential Step)

Before starting, knit a gauge swatch using your chosen yarn and needles.

  • Wash and block the swatch
  • Measure stitches and rows per inch/cm

Skipping this step is the most common cause of sizing issues.


2️⃣ Knitting the Body

The body of a Classic Knitting Sweater is intentionally simple.

  • Start with ribbing (1×1 or 2×2)
  • Transition to stockinette stitch
  • Maintain even tension for a clean finish

This simplicity highlights craftsmanship over decoration.


3️⃣ Shaping the Armholes

If knitting flat, armholes are shaped gradually.

  • Bind off stitches evenly
  • Keep edges neat for easy seaming

If knitting top-down, armhole shaping happens naturally through increases.


4️⃣ Knitting the Sleeves

Sleeves are often the most time-consuming part.

  • Begin with ribbed cuffs
  • Increase gradually toward the upper arm
  • Match sleeve length carefully

Balanced sleeves are essential for comfort and appearance.


5️⃣ Collar and Neckline

The neckline defines how the sweater feels when worn.

  • Pick up stitches evenly
  • Knit ribbing to desired height
  • Bind off loosely

A tight neckline can ruin an otherwise perfect sweater.


6️⃣ Blocking and Finishing

Blocking transforms the sweater.

  • Wash gently
  • Pin to final measurements
  • Allow to dry completely

This step gives the Classic Knitting Sweater its polished, professional look.


🌟 Pro Tips for a Timeless Finish

  • Choose classic colors over trends
  • Focus on stitch consistency
  • Reinforce seams for longevity
  • Block before judging fit
  • Keep shaping subtle and balanced

Small details make a significant difference in wearable knits.


🧼 Care Instructions for a Classic Knitting Sweater

Proper care ensures your sweater lasts for years.

Wool & Wool Blends

  • Hand wash in cold water
  • Use gentle wool detergent
  • Lay flat to dry

Easy-Care Yarns

  • Gentle machine wash
  • Cold water only
  • Avoid heat

Storage Tip: Always store folded to prevent stretching.


💬 What the Knitting Community Says

Across knitting forums and social platforms, the Classic Knitting Sweater is often described as:

  • A milestone project
  • A confidence builder
  • A wardrobe staple
  • A pattern knit repeatedly

Many knitters consider it the project that truly taught them garment construction.


📄 Get the Full Classic Knitting Sweater PDF Pattern (Etsy)

If you want clear instructions, sizing guidance, and a printable format, you can access the complete Classic Knitting Sweater PDF pattern on Etsy.

✔️ Step-by-step instructions
✔️ Clear sizing details
✔️ Beginner-friendly layout
✔️ Instant download

👉 Click here to Access the Etsy PDF Pattern!

This PDF is perfect if you prefer working offline or want a polished, easy-to-follow pattern.

Hand-knit Classic Knitting Sweater made with traditional construction and clean, timeless design

FAQs ❓

Is this suitable for beginners?
Yes, especially with a flat-knit construction.

What stitch is most common?
Stockinette stitch with ribbing.

What yarn weight is best?
DK or worsted weight.

Can I customize the fit?
Absolutely — length and width are easily adjustable.

Why does my sweater feel stiff?
Blocking and fiber choice usually solve this issue.


🔗 See Also (Internal Links)


📌 CTA

Love timeless knits like the Classic Knitting Sweater?

👉 Follow us on Pinterest for elegant knitting inspiration
👉 Join us on Facebook for patterns, tips, and classic knitwear ideas

Cherry Triangle Scarf Knit: Stunning Free Pattern + Chart Guide 🍒🧣

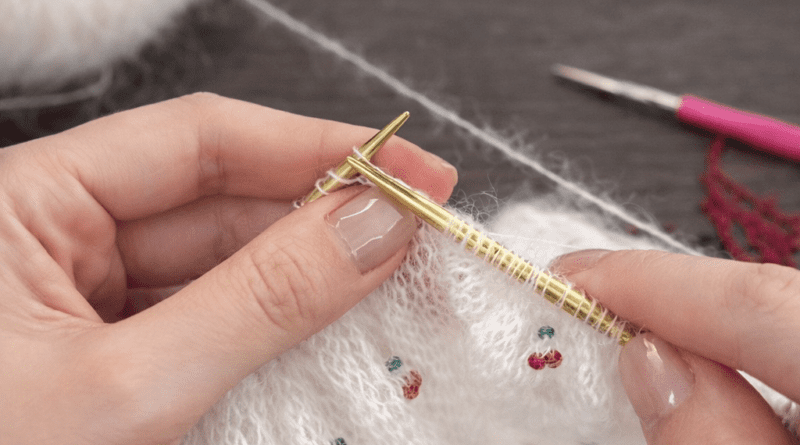
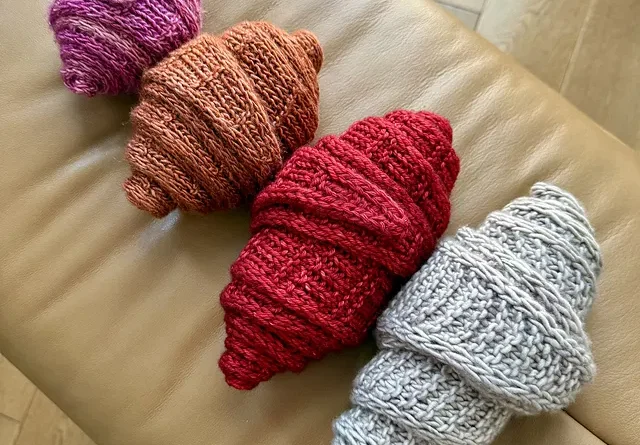
If you love quick knits with a cute statement detail, this Cherry Triangle Scarf Knit is going to be your new favorite. It’s that trendy triangle scarf shape (easy to style, super wearable), with a sweet cherry motif that makes it feel playful without being “too much.”

This post will walk you through the full process: how to knit the cherry triangle scarf, how to follow the chart you’ll add, finishing details, plus pro tips, care instructions, FAQs, and what knitters typically say when they make this style.


About This Cherry Triangle Scarf Knit Pattern ✨

This is a free knitting pattern for a cherry triangle scarf (bandana-style scarf). You’ll knit from the top center down, increasing to form a triangle. Then you’ll add the cherry design using the chart (the grid chart you’ll attach).

Skill Level

Beginner → Easy Intermediate (because of chart reading and finishing)

Finished Look

  • Cherry triangle scarf that ties at the back/side
  • Cherry motif placed in the center (or slightly off-center if you prefer)
  • Clean edges that look polished in photos

Materials + Amazon Affiliate Picks 🧶

Here are practical supplies that make this cherry triangle scarf cleaner, faster, and more professional.

Yarn (choose one vibe):

Needles (pick based on your yarn label):

Tools that help a lot:


How the Chart Works 🧩

Cherry Triangle Scarf Knit chart showing stitch-by-stitch grid for the cherry motif

Most knit charts work like this:

  • Each little square = one stitch
  • You follow the chart from bottom to top
  • On the right side rows, you usually read right → left
  • On the wrong side rows, you usually read left → right
    (unless your chart notes say “RS only,” which is common for motifs)

Common Chart Key Examples (you can adjust to match your chart legend)

  • Blank square = knit (stockinette RS)
  • Colored square = contrast color (cherry red)
  • Green square = leaves/stem

If your chart includes a legend, keep it right under the image in your post.


Step-by-Step: Cherry Triangle Scarf Knit 🍒

1) Cast On (Top Center Start)

Cast on 3 stitches.

Row Setup (Triangle Base Formula)

You’ll increase every right-side row to build the triangle.

Row 1 (RS): Knit all stitches
Row 2 (WS): Purl all stitches (or knit all stitches if you want garter stitch)

Increase Row (Repeat)

On every RS row, do:

  • Knit 1
  • Increase (M1 or YO)
  • Knit to last stitch
  • Increase (M1 or YO)
  • Knit 1

This creates a clean edge and grows the triangle evenly.

Tip: Place a stitch marker near each edge stitch so you don’t forget to keep the edges consistent.


2) Choose Your Fabric Look

Pick ONE stitch style:

Option A: Moss Stitch (The chosse in the viral video)

  • Knit every row
    Pros: lays flat, easy, no curling

Option B: Stockinette Stitch (More “clean and modern”)

  • RS: knit
  • WS: purl
    Pros: crisp design, chart looks very clear
    Note: stockinette can curl, so blocking matters.

3) When to Start the Cherry Chart

Once your triangle has enough width to fit the motif, start the chart.

A simple rule:

  • Start the cherry chart when you can center it and still keep a few stitches on each side for balance.

Centering the Motif

Count your stitches and find the center stitch.
Position the chart so the motif sits centered (or intentionally off-center for a modern look).

Pro tip: Use a removable marker or safety pin at the center stitch so you can quickly align the chart.


4) Knitting the Chart (Motif Section)

There are two common ways charts are used on scarves:

Method 1: Intarsia (Best for a larger solid motif)

  • You use separate yarn bobbins for red/green areas
  • Twist yarns at color changes to avoid holes

Method 2: Duplicate Stitch (Easiest for beginners)

  • Knit the entire scarf in one color
  • Then embroider the cherry motif on top using the chart
    Pros: super clean, no yarn tangles, perfect for beginners

✅ If your audience is mixed skill-level, you can mention both and say:

“If you’re new to colorwork, duplicate stitch is the simplest way to get a crisp cherry motif.”


5) Finish the Triangle (Size)

Keep increasing until you reach your preferred size.

Typical triangle scarf sizing:

  • Small/Classic bandana: ~70–90 cm wingspan
  • Bigger statement triangle: ~100–130 cm wingspan

Then finish with a clean edge row.


6) Bind Off (Neat + Stretchy)

Use a bind-off that won’t pull too tight:

  • Standard bind-off (works fine if you bind off loosely)
  • Or a stretchy bind-off if your edges tend to tighten

7) Weave In Ends + Optional Ties

  • Weave in ends on the wrong side using a tapestry needle
  • Optional: add i-cord ties or braided ties to secure it

Watch the Video Tutorial to Support You Make the Scarf or Access the PDF Pattern on Etsy here.

Hand-knitted cherry triangle scarf with chart-based design and clean knitted edges

🌟 Pro Tips for a Professional Finish for your Cherry Triangle Scarf

  • Block it. Always. Blocking turns “homemade” into “boutique.”
  • If using stockinette, add a garter border (like 3–5 stitches at each edge) to reduce curling.
  • For colorwork: keep floats neat (if stranded) or choose duplicate stitch.
  • Use a lifeline before the motif section if you’re nervous—easy to undo safely.
  • If your chart has lots of small color switches, duplicate stitch looks cleaner than tangled bobbins.

🧼 Care Instructions of Cherry Triangle Scarf (So It Stays Perfect)

Care depends on yarn fiber. These are safe general guidelines:

If Cotton / Cotton Blend

  • Gentle machine wash cold (or hand wash)
  • Lay flat to dry
  • Light steam block if needed

If Wool / Wool Blend

  • Hand wash cold with gentle wool wash
  • Do not wring—press water out in a towel
  • Lay flat to dry, reshape edges

✅ Storage tip:

  • Store folded, not hanging (triangle scarves can stretch on hangers).

💬 What the Knitting Community Usually Says About This Style

Cherry Triangle scarves are popular because:

  • They’re fast compared to full-size scarves
  • They’re stylish and photograph well (Pinterest-friendly!)
  • They work year-round depending on yarn choice

Knitters also love motifs like cherries because they:

  • Add a “cute core” vibe without being childish
  • Make a simple base pattern feel unique
  • Are easy to personalize (different cherry colors, add leaves, add more cherries)

FAQs ❓

1) Is this Cherry Triangle scarf pattern beginner-friendly?

Yes—especially if you do the cherry motif with duplicate stitch. The triangle shape is very beginner-friendly.

2) Do I need circular needles?

Not required, but strongly recommended because the stitch count grows and circulars hold stitches comfortably.

3) My cherry triangle scarf edges look wavy—what do I do?

That’s usually uneven increases or tension. Add edge stitches (knit 1 at each side consistently) and block at the end.

4) My stockinette is curling. Is that normal?

Yes. Add a garter border, or block firmly. Garter stitch base is the easiest fix.

5) Where should I place the cherry motif?

Most people place it near the center area of the triangle so it shows when tied. You can also place it lower for a dramatic look.

6) Can I sell finished items made from this?

Usually yes for finished items, but always respect the original designer’s rules if you’re using a specific published chart.


✅ See Also (Internal Links) 🔗


📌 CTA: Follow Us for More Patterns!

If you enjoyed this Cherry Triangle Scarf Knit, you’ll love the other cozy patterns we share weekly.

👉 Follow us on Pinterest for more chart-based knits and trending accessories.
👉 Join us on Facebook for community tips, pattern drops, and new freebies.