
African Flower Granny Square Dress — Free Crochet Tutorial
The african flower granny square dress is exactly what it looks like — a full wearable dress made entirely from joined african flower motifs. No complicated garment shaping, no increasing mid-row, no pattern pieces to cut. You make the squares, you join them, you have a dress.
It went viral on TikTok for a reason: the construction is genuinely approachable, the result looks like something you’d pay a lot of money for, and you can fully customize the length, color, and fit by adjusting how many squares you use.
This guide walks you through everything — how many squares you need, how to plan the layout, how to assemble the bodice, how to add straps, and the honest details about what’s actually involved before you commit to 80+ squares.
Before You Start — Make the Square First
The dress is built from the african flower granny square dress repeated as many times as needed. If you haven’t made one yet, start there — the full written pattern with stitch counts is on that page.
Once you’re comfortable making one square in about 30–40 minutes, you’re ready for the dress.
Materials
This post contains Amazon affiliate links.
| Item | Details |
|---|---|
| Yarn | 100% cotton DK or fine weight — breathable and comfortable against skin |
| Hook | 3.0–3.5mm for fine yarn / 4.0mm for DK |
| Notions | Yarn needle, scissors, pins for blocking and assembly |
| Optional | Zipper (invisible zip works best), sewing needle and thread |
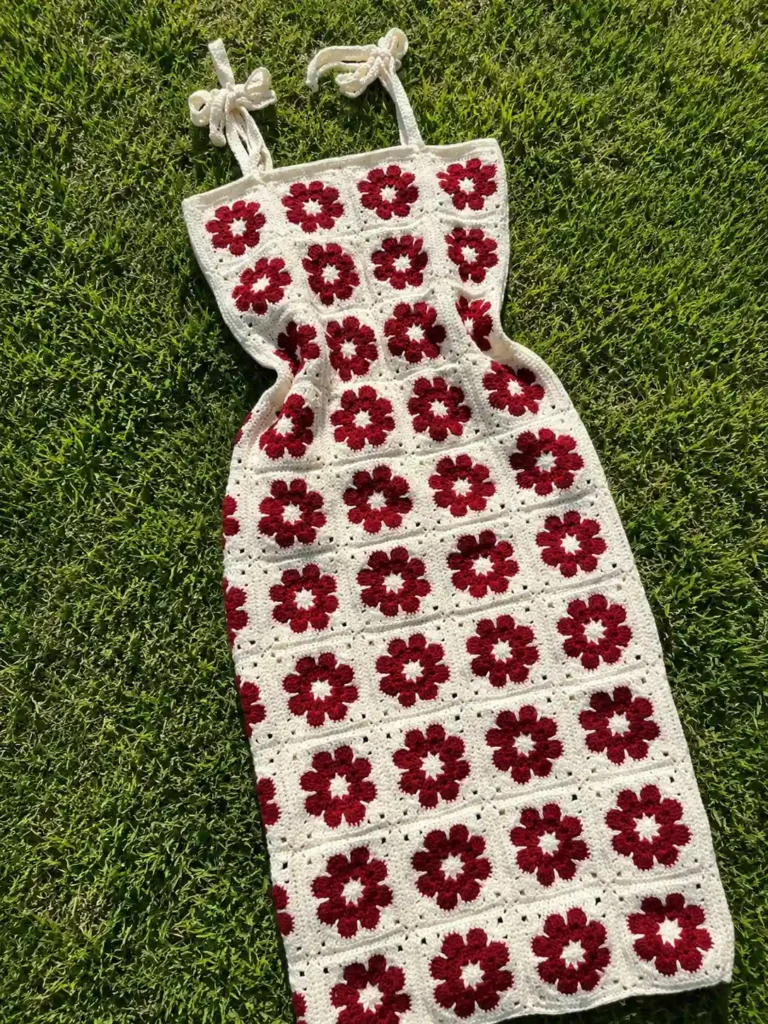
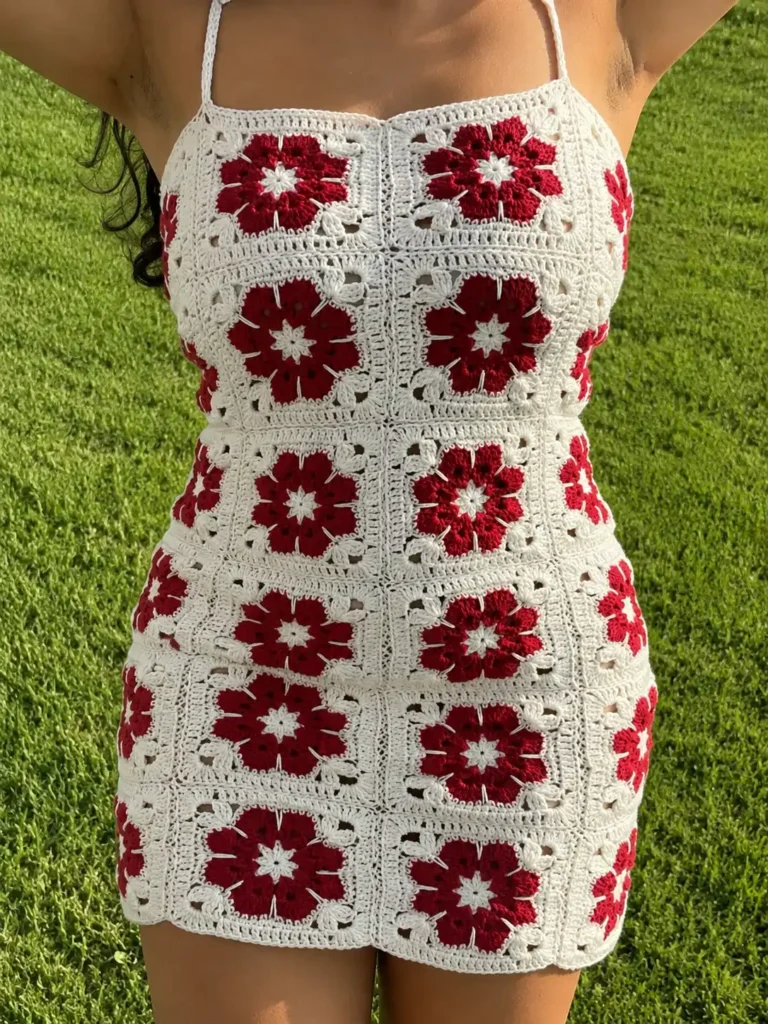
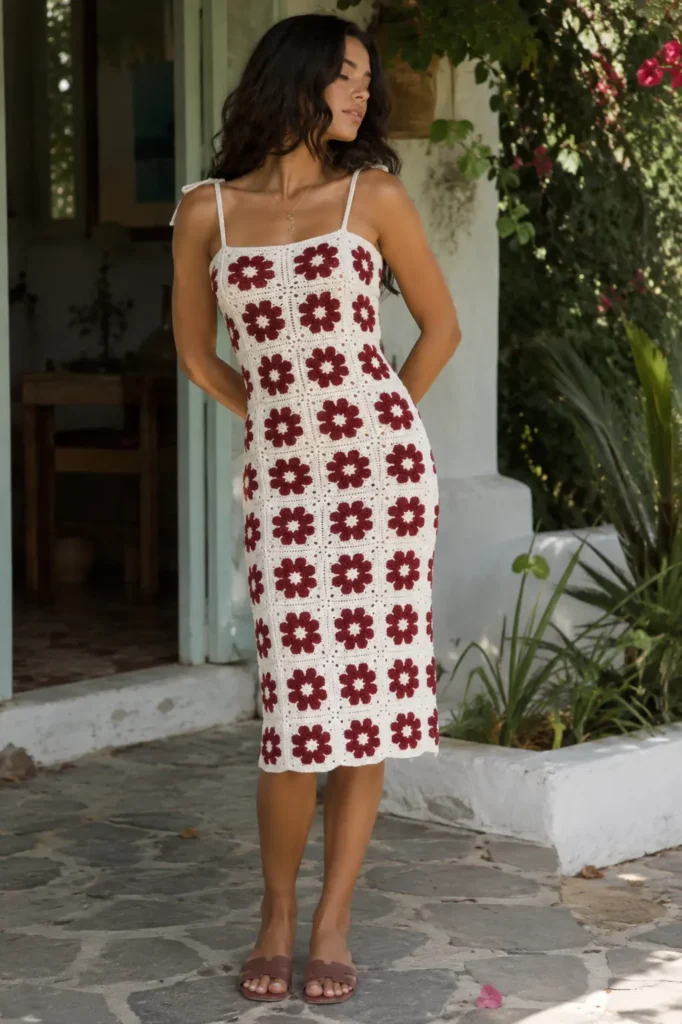
Colors: 2–3 colors work best for the dress. A light neutral background (cream, white, ivory) with 1–2 contrasting petal colors gives the cleanest result — see the photos for reference. The burgundy/cream and red/cream combinations in the photos above both use the same structure with different color choices.
Yarn notes: Cotton is strongly recommended for a dress. It’s breathable, drapes well, and holds its shape after washing. Acrylic works but can feel warm and stretchy in ways that affect the fit over time.
How Many Squares Do You Need?
This is the question everyone asks first — and the honest answer is: it depends on your size and the length you want.
As a starting point based on the dress in the photos and the TikTok tutorial by Shayla East:
| Dress Style | Squares Needed | Layout |
|---|---|---|
| Mini dress | 28–36 | 4 rows × 7 squares |
| Midi dress | 56–70 | 7–9 rows × 7 squares |
| Maxi / ankle length | 80–100 | 10–12 rows × 7–8 squares |
The only way to know your exact count: measure your bust, decide how many squares fit across (usually 6–8 for most sizes with a 4.5-inch square), and then calculate how many rows you need for your desired length.
Make a few squares first, measure them blocked, and do the math before committing to the full count.
Planning the Layout
Sketch your layout before you start joining — this saves a lot of unjoining later.
Bodice: typically 4 rows of squares. The number of squares per row determines the width — try it on as you go rather than committing to a fixed number.
Skirt: continues from the bodice downward. You can add an extra square per row to create subtle flare, or keep the same count for a straight silhouette.
Straps: worked separately in hdc or chains directly from the top edge of the bodice — not additional squares.
Zipper opening: if adding a zipper, leave a 2–3cm gap between the two back panels when joining. This gives you room to install the zipper without stretching the squares.
Assembly — Step by Step
Step 1 — Block your squares first
Before joining anything, block every square to the same measurements. Unblocked squares vary slightly in size and the joins will show unevenness. Block, pin to measurements, let dry completely.
Step 2 — Join squares into rows
Hold two squares face to face (right sides together). Join yarn at the corner, sl st through both corner spaces, then sl st through the back loops of both squares across the entire side. Fasten off.
Repeat until you have rows of the width you need.
For a slightly softer join with more drape, use hdc instead of sl st between squares — this is what Shayla East uses in the skirt section to add subtle width.
Step 3 — Join rows together
Line up the seams carefully before joining — misaligned seams are the most common issue with this dress. Use pins to hold the rows in position before sl stitching.
Join rows the same way as joining individual squares — face to face, sl st through back loops.
Step 4 — Try it on as you go
This is the most important tip in this entire post. Try the bodice on before starting the skirt. Try the first few skirt rows on before committing to the full length. Adjustments are easy when you catch them early and very tedious after the fact.
Step 5 — Add the top border
Before adding straps, work 1–2 rows of hdc around the entire top edge of the dress. This stabilizes the top, gives the straps something solid to attach to, and finishes the neckline cleanly.
Step 6 — Add straps
From the top border, work chains for the desired strap length, then sc back down the chain to create a firm strap. Attach at the back in the corresponding position.
Alternatively: tie straps from a long chain, like in the burgundy/cream dress in the photos above.
Step 7 — Weave in ends
This is the most time-consuming part of the entire project — 80+ squares means 80+ centers to secure, plus all the joining ends. The centers specifically need careful securing because they can unravel if not woven in properly.
Step 8 — Add zipper (optional)
Hand tack the zipper to the back opening first, then either hand sew or machine sew with a zipper foot. A sewing machine isn’t necessary — hand sewing works fine and gives you more control over the fit.
Watch the Full Tutorial
The viral TikTok tutorial by Shayla East is the best visual reference for the assembly process — especially the bodice construction, increasing for the skirt, and strap attachment.
👉 Watch the African Flower Granny Square Dress tutorial by Shayla East on TikTok
Tips From One Crocheter to Another
Make one test square before committing to your yarn and hook combination. Block it, measure it, then calculate your total square count. Starting with the wrong gauge means remaking everything.
The bodice is the hardest part to fit. Work it first, try it on before joining the skirt rows, and adjust early. Adding or removing a square at the bodice stage is manageable — doing it after the skirt is attached is not.
Seam alignment matters more than you’d expect. Pin your rows before joining and check that the square seams line up vertically. Misaligned seams make the dress look uneven even when all the squares are identical.
Cotton yarn grows slightly with wear. Make the dress slightly shorter than your target length — after a few wears it will relax to where you want it.
Weave in the centers as you go. Don’t save all 80+ centers for the end. Weave in each square’s center tail immediately after making it, while the square is still small and easy to handle.
Color Combinations
The dress in the photos uses two classic combinations:
Burgundy + cream — timeless and elegant. The high contrast makes the flower structure very visible.
Red + cream — similar aesthetic, slightly more vibrant. Works beautifully in photos.
Teal + white — cool and summery. Very popular on TikTok and Pinterest.
Pastel multicolor — different petal color for each square. More complex to plan but striking as a finished dress.
Monochrome — two shades of the same color. Subtle and sophisticated.
Frequently Asked Questions
How long does the african flower granny square dress take to make?
Most makers report 2–4 weeks working a few hours per day. The squares themselves go quickly once you have the pattern memorized — it’s the assembly and end-weaving that takes the most time.
What size hook and yarn should I use?
Fine weight (#2) cotton with a 3.0–3.5mm hook gives a tighter, more structured fabric that holds the dress shape well. DK weight with a 4.0mm hook is faster and produces a slightly more relaxed drape.
Do I need a zipper?
No — many versions use tie straps or stretchy joins that allow the dress to slip on without a zipper. If your bodice fits closely, a zipper makes getting in and out much easier.
Can I make this without a sewing machine?
Yes. Hand sewing the zipper takes longer but gives you more control. All the crochet joining is done by hand anyway.
How do I wash the finished dress?
Machine wash cold, gentle cycle, in a mesh laundry bag. Lay flat to dry — hanging a wet crochet dress will stretch it out of shape.
Can I sell a dress made from this pattern?
The square pattern is traditional and the assembly method is general crochet technique — yes, you can sell finished dresses. Please credit Patterns Here for the square tutorial.