
Lizard Crochet Coaster Pattern Free (Viral Amigurumi)
This lizard crochet coaster is the silliest thing I’ve made all year, and I mean that as a compliment. It’s the meme-y, screaming, tongue-out lizard that’s been all over crochet TikTok lately — and it’s exactly as fun to make as it looks.
It uses the same scrap-yarn approach as our daisy coaster — small amounts of green, red, pink, and white are all you need. Same coaster base, completely different personality.
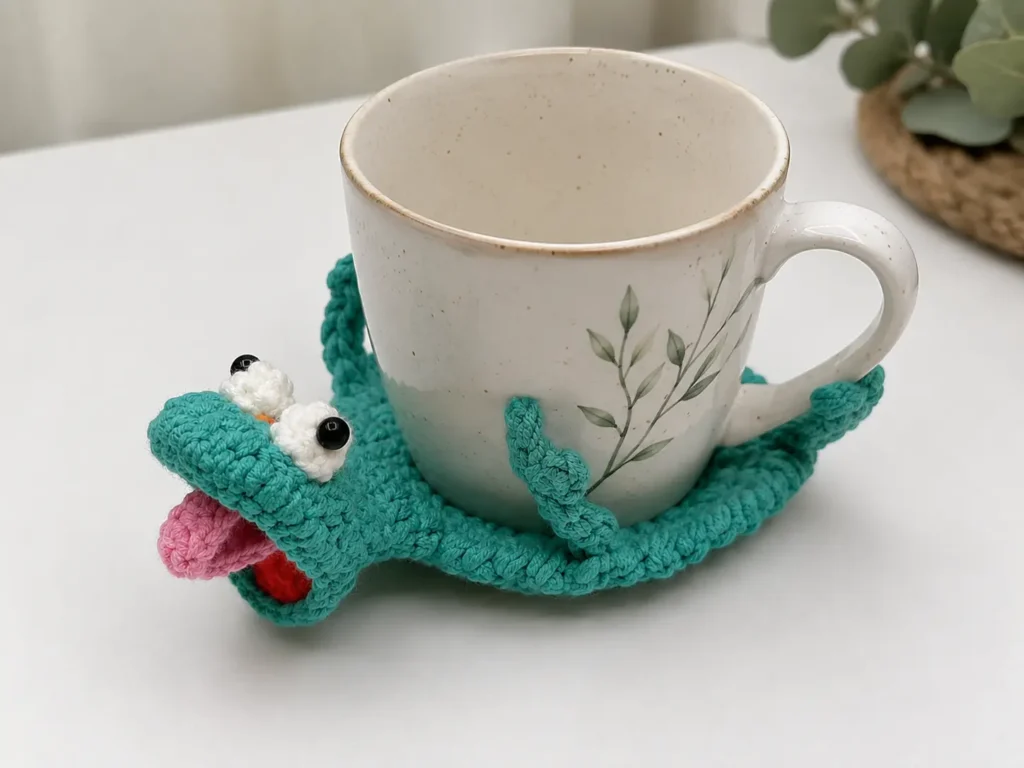
Crochet Lizard Coaster — finished green amigurumi coaster with open mouth, pink tongue, and safety eyes on wooden table
Materials
This post contains affiliate links. If you purchase through these links, I may earn a small commission at no extra cost to you.
Yarn
- Green cotton yarn (worsted weight) — for the coaster body, head, tail, and legs
- Red cotton yarn (small amount) — for the inside of the mouth
- Pink cotton yarn (small amount) — for the tongue
- White cotton yarn (small amount) — for the eyes
- Small black safety eyes or black embroidery thread — for the pupils
Hook
- 3.5mm–4mm crochet hook (cotton needs a tighter tension to keep this lizard crochet coaster sitting firm and flat, regardless of what your yarn label recommends)
Other supplies
- Yarn needle
- Scissors
- Stitch marker
- Small amount of poly-fil (optional, just for lightly shaping the head)
- Hot glue gun or sewing needle, for attaching the safety eyes
Finished size: approximately 5–6 inches across at worsted weight with a 4mm hook. If you’d like a smaller lizard crochet coaster, stop the body after Round 3 instead of working Round 4.
Abbreviations (US Terms)
Check our complete abbreviations guide.
- ch — chain
- sl st — slip stitch
- sc — single crochet
- hdc — half double crochet
- dc — double crochet
- inc — increase (work 2 stitches into the same stitch)
- dec — decrease (crochet 2 stitches together)
- st(s) — stitch(es)
- rnd — round
- rep — repeat
- MR — magic ring (check our magic circle crochet tutorial if you need a refresher)
Lizard Crochet Coaster — Step by Step
This lizard crochet coaster is built in pieces — a main body worked in joined rounds, plus a separately-made head, tail, mouth insert, tongue, eyes, and legs that all get sewn together at the end. It sounds like a lot of parts, but each piece is quick, and the assembly is genuinely satisfying — that’s the moment this project stops looking like scraps and starts looking like a lizard.
Main Body
Worked in joined rounds (sl st to close each round, ch 3 to start the next — the ch 3 counts as your first dc throughout).
Rnd 1: Magic ring, ch 3, 11 dc into the ring. Join with sl st to top of beginning ch 3. Pull ring closed. (12 sts)
Rnd 2: Ch 3, dc in same st, 2 dc in each st around. Join with sl st. (24 sts)
Rnd 3: Ch 3, dc in same st, dc in next st, *2 dc in next st, dc in next st; rep from * around. Join with sl st. (36 sts)
Rnd 4: Ch 3, dc in same st, dc in each of next 2 sts, *2 dc in next st, dc in each of next 2 sts; rep from * around. Join with sl st. (48 sts)
Rnd 5: Ch 1, reverse sc in each st around. Join with sl st. Fasten off and weave in ends.
Crochet lizard coaster body — finished green flat circle with reverse single crochet edging, ready for assembly
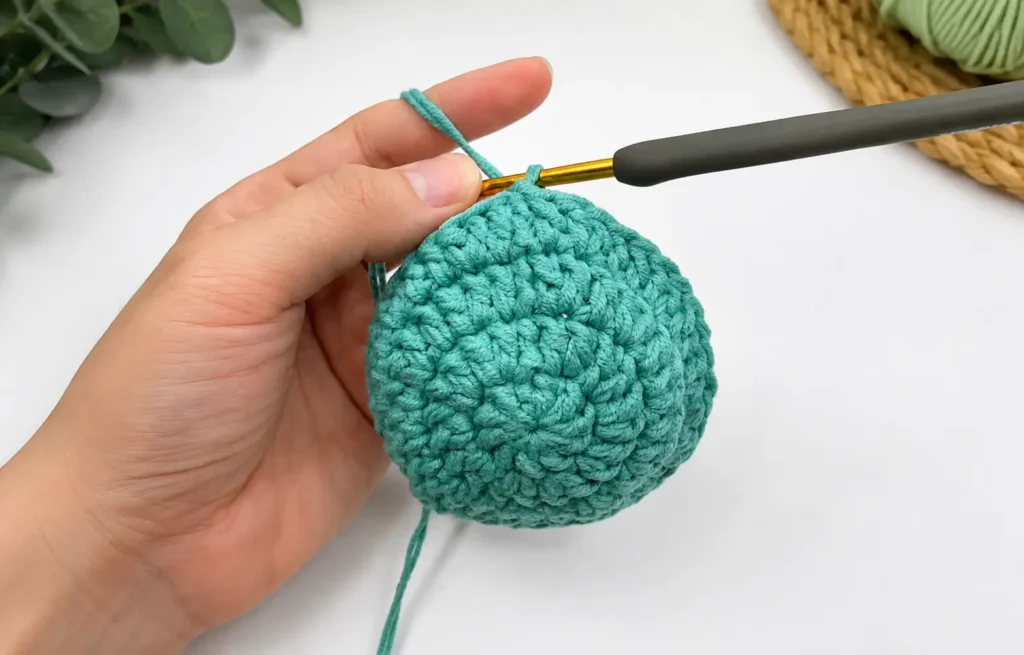
This is the point where I always pause and just admire the flat circle for a second — if yours is cupping instead of lying flat, it usually means the tension is a touch loose. A firmer cotton grip keeps this lizard crochet coaster sitting properly under a mug instead of curling at the edges.
Tail
Worked in joined rounds, same as the body.
Rnd 1: Magic ring, ch 2, 4 dc into the ring. Join with sl st. (4 sts)
Rnd 2: *(dc, dc inc); rep from * around. Join with sl st. (6 sts)
Rnd 3: 6 dc around. Join with sl st. (6 sts)
Rnd 4: *(2 dc, dc inc); rep from * around. Join with sl st. Fasten off, leaving a long tail for sewing. (8 sts)
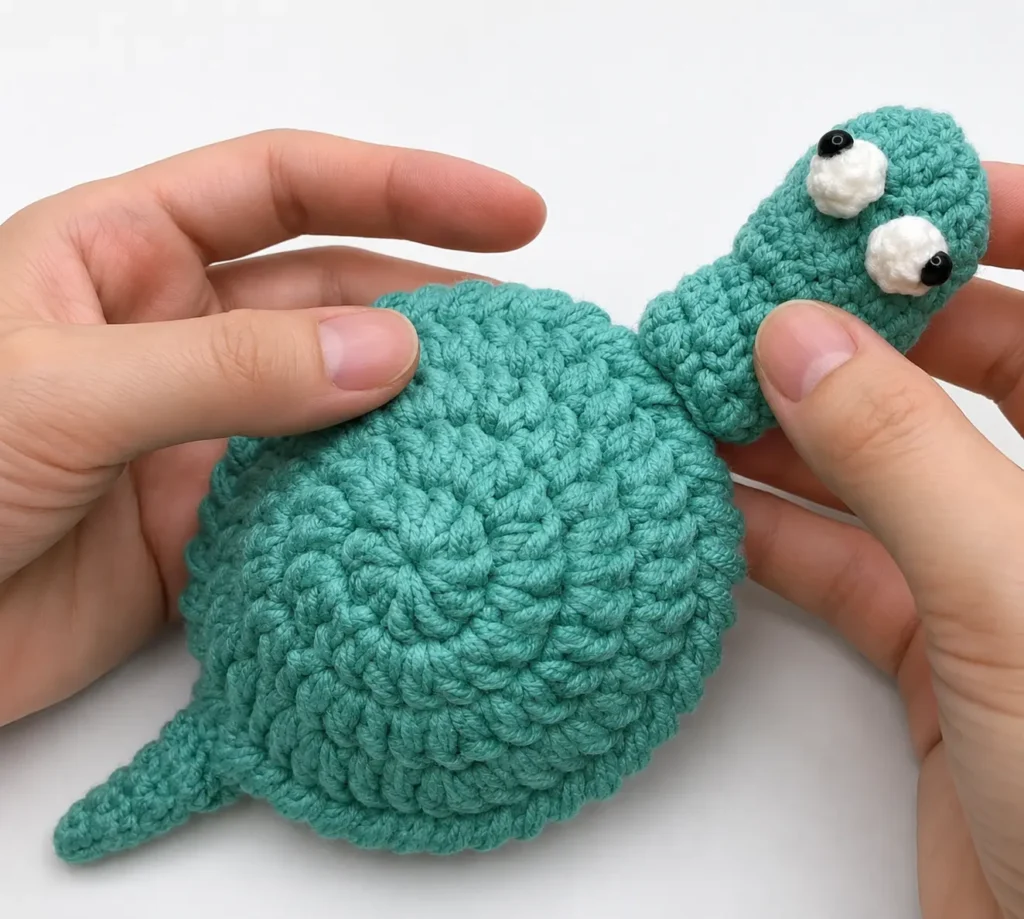
Crochet lizard coaster tail — short tapered green piece held between fingers before sewing
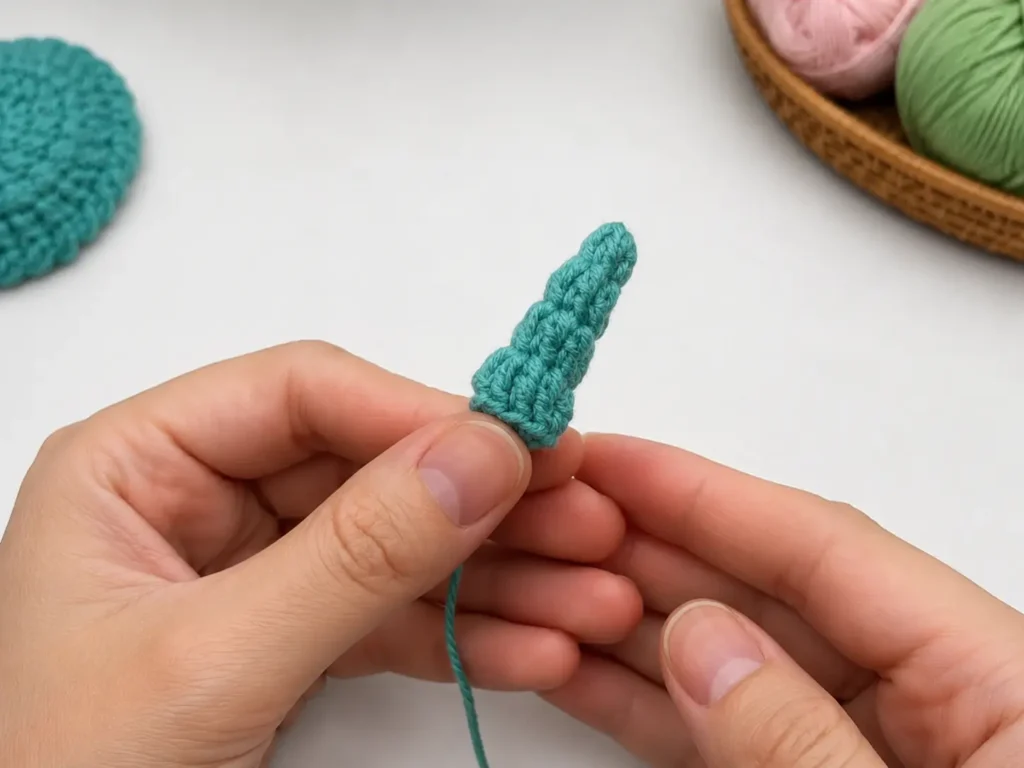
Flatten the tail piece and set it aside — you’ll sew this onto the body once the head is in place, so the two ends balance each other out.
Head
Worked in joined rounds, starting from a foundation chain rather than a magic ring, which gives the head its slightly elongated shape.
Foundation: Ch 14, join with sl st to the first chain to form a ring, being careful not to twist it.
Rnd 1: Ch 1, hdc dec, 10 dc, hdc dec. Join with sl st. (12 sts)
Rnd 2: Ch 2, dc inc, 2 dc, 6 hdc, 2 dc, dc inc. Join with sl st. (14 sts)
Rnd 3: Ch 1, 2 dc, 3 hdc, 4 sc, 3 hdc, 2 dc. Join with sl st. (14 sts)
Do not fasten off — you’ll work the upper jaw directly across the next 8 stitches.
Upper Jaw
Worked in rows, turning at the end of each row.
Row 1: Ch 2, dc inc, 6 dc, dc inc. Turn. (10 sts)
Row 2: Ch 2, dc dec, 6 dc, dc dec. Turn. (8 sts)
Row 3: Ch 2, dc dec, 4 dc, dc dec. Turn. (6 sts)
Row 4: Ch 2, dc dec, 2 dc, dc dec. Fasten off and weave in the end. (4 sts)
Lower Jaw
Rejoin green yarn to the remaining lower front section of the head, directly underneath the upper jaw.
Row 1: Ch 1, work 6 hdc evenly across the lower jaw stitches. Turn. (6 sts)
Row 2: Ch 1, hdc dec, 2 hdc, hdc dec. Fasten off and weave in the end. (4 sts)
Inside Mouthpiece (red yarn)
Foundation: Ch 10.
Rnd 1: Starting in the 2nd ch from hook, work 8 sc, 3 sc in the last ch. Working along the opposite side of the foundation chain, work 7 sc, 2 sc in the last ch. Join with sl st. (20 sts)
Rnd 2: Ch 1, 2 sc in first st, 7 sc, 2 sc in each of next 3 sts, 7 sc, 2 sc in each of last 2 sts. Join with sl st. Fasten off, leaving a long tail for sewing. (26 sts)
Tongue (pink yarn)
Attach pink yarn to the center front of the red mouthpiece. Ch 10. Starting in the 2nd ch from hook, work 9 sc back along the chain. Fasten off and weave in ends.
Eyes (white yarn, make 2)
Rnd 1: Magic ring, 6 sc into the ring. (6 sts)
Rnd 2: Sc in each st around. Fasten off, leaving a long tail for sewing. (6 sts)
Legs (make 4)
Ch 7. Starting in the 2nd ch from hook, sl st in each of next 2 chains. First toe: ch 3, sl st in the 2nd ch from hook and next ch, then sl st back into the same main chain stitch. Second toe: ch 3, sl st in the 2nd ch from hook and next ch, then sl st back into the next main chain stitch. Work 4 sc along the remaining main chain. Fasten off, leaving a long tail for sewing. Repeat until you have 4 legs total.
Assembly
This is where your lizard crochet coaster actually starts looking like, well, a lizard. Take your time here — good placement makes a much bigger difference than perfect stitches.
- Lay the main body flat on your work surface.
- Sew the tail to one side of the body.
- Sew the head to the opposite side, positioning the open mouth so it faces outward.
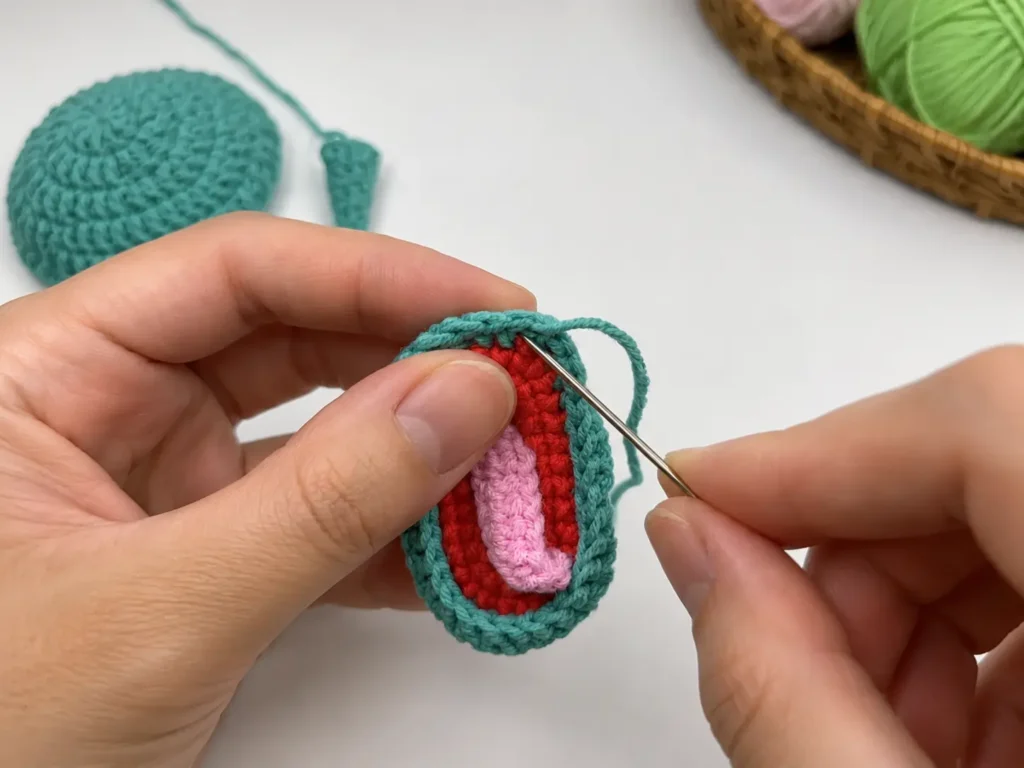
- Sew the red mouthpiece inside the mouth, between the upper and lower jaw.
- Sew or secure the pink tongue to the center of the red mouthpiece.
Crochet lizard coaster mouth assembly — sewing the red mouth insert and pink tongue into the open jaw with a yarn needle
- Sew the white eyes onto the top of the head, then attach the black safety eyes (or embroider pupils) for the pupils.
- Sew the 4 legs evenly around the body — 2 on each side.
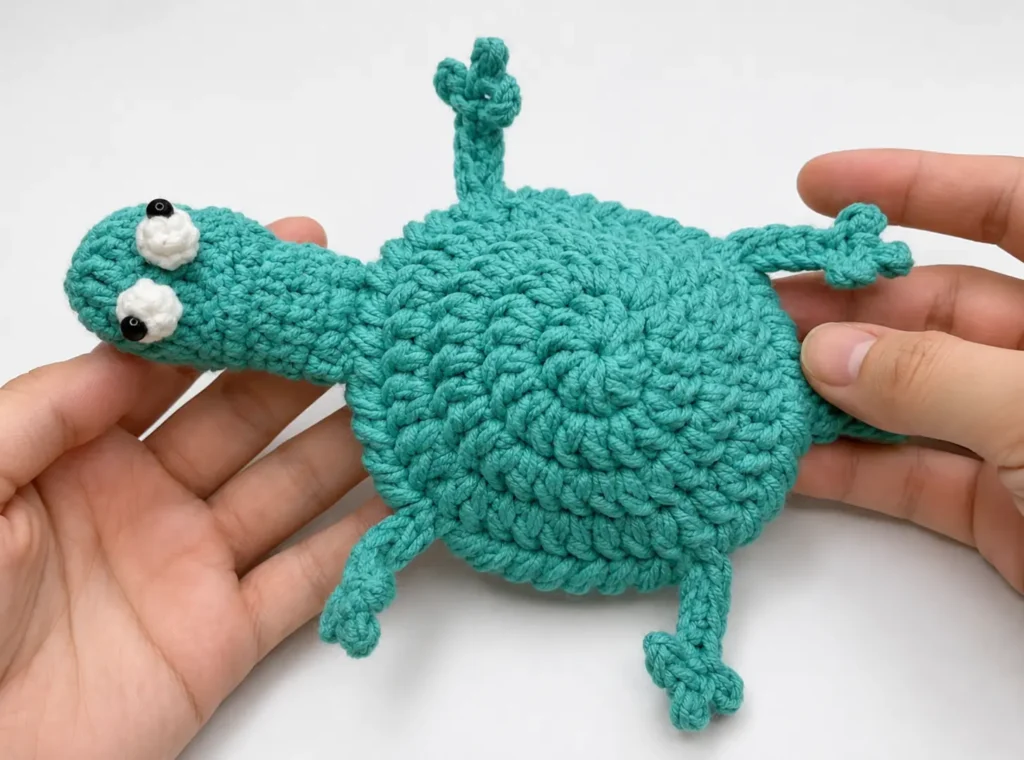
Crochet lizard coaster before legs — head, tail, and eyes already sewn onto the flat body, ready for the final assembly step
- Weave in all loose ends.
If it’s not sitting quite flat, a light steam or damp block smooths it right out.
Crochet lizard coaster finished — green amigurumi coaster with red open mouth, pink tongue, and safety eyes, viral crochet meme pattern.
Tips From One Crocheter to Another
Stick to a 3.5mm–4mm hook. Anything bigger and this lizard crochet coaster turns out floppy instead of firm.
Count stitches after every jaw row — the upper and lower jaw are small enough that one missed stitch throws off the whole shape.
Don’t overthink the mouthpiece. A few whip stitches around the edge is all the red insert and tongue need.
Skip the plastic safety eyes if kids will be around this lizard crochet coaster — embroidered pupils are the safer bet.
Variations
Gecko colorway — swap green for brown and tan for a more realistic look.
Cartoon brights — bold lime or teal with an exaggerated red mouth.
Mini size — 3mm hook and lighter yarn for a coffee-cup-sized version.
Garden set — make 4–6 in slightly different greens for a mismatched-but-coordinated set.
Project Ideas
Novelty gift set — pair with a fun mug for a gift that gets an actual laugh.
Reptile lover’s coaster set — a small, personal gift for anyone into geckos or reptiles.
Market or craft fair item — stands out on a table full of more traditional patterns.
Teacher or coworker gift — quick to make in bulk and easy to remember.
FAQs
Is this lizard crochet coaster suitable for beginners? Mostly — the jaw rows are a bit fiddly, so it helps to have one round coaster or amigurumi under your belt first.
Why is my lizard crochet coaster cupping instead of lying flat? Usually tension. Drop to a 3.5mm hook and double-check you didn’t skip an increase in Rounds 2–4.
Can I make it bigger or smaller? Yes — stop after Round 3 for smaller, or add an increase round before Round 5 for bigger.
What yarn works best? Cotton, for a firmer finish. Hold two strands together if yours is on the thin side.
Do I need safety eyes? No — embroidered pupils work just as well and are safer around young kids.
Can I sell finished lizard crochet coasters made from this pattern? Yes. Please credit Patterns Here as the pattern source.
How long does one take to make? About 45–60 minutes with all the small pieces and assembly.